Viewing entries in
Training Tips

Top 10 Running Tips that helped me become a 1:17 Half Marathoner in Half Ironman Triathlon

6 Comments

Top 10 Running Tips that helped me become a 1:17 Half Marathoner in Half Ironman Triathlon

Running, like the other three sports, presents its unique challenge. It's the sport that people have most challenge staying healthy in, from my observation. I do acknowledge that swimming(shoulder injuries), and cycling (knee, hip, etc), but most of the time people swim and bike because they can't run. Shin splints, bad knee, IT band, hip issues, are all common household names amongst endurance runners. And while some people do successfully get to peak shape, they fail to hold it for long due to injury or fatigue.

I've seen a lot of my good friends that are extremely talented thwarted with injuries. I've also made some mistakes of my own (IT band injury last year resulted  from complication of bad bike crash at Vineman 70.3 '15), but I stayed relatively healthy compared to my competitors and friends that I trained with over the years. I've taken lessons learned from my friend and by observing what works for people that do stay healthy and competitive consistently over the years. 

Part I Preventing Injury

1. Never Shock the Body. Your body is very much like you. You don't like surprises. Sudden stressful situations makes us uncomfortable and distressed. The same with your body. Sudden increase in your mileage ( you ran 20 miles last week, and this week you suddenly ran 35 miles) is often what causes most people to be sidelined. 

2. If you're just getting back into running, avoid running with people that are in shape or much faster than you at the moment. I often disappear for 3 months when I'm just getting back into shape. I don't want to be pressured into running fast or keeping up with people or running as far as them. If 4 miles feels exhausting to me, I'm gonna stop and take a nap. Once I get into shape, that's when I show up and push myself with people again. Take it slow, be patient, the fitness will come!

Here's an example for what I did to get back in shape after my injury:
First week, couple of 6x(2 minute easy running (9min pace) 1 minute walk.)
Second week, 6x(3min easy running, 1 minute walk)
Third week, 6x(4min easy running, 1 minute walk)

After I felt that there was no pain, I started running a couple of 40 minute runs on grass super easy. But see how I was extremely patient to get back into shape, taking no risk at all. You never want to take 2 steps forward and 1 step back. 2 weeks later I was running 5 mile runs at 6 minute pace. The fitness WILL COME!

3. Take care of small pains before they become big ones. Get a massage at least once or twice a month. It's hard to spend money on yourself for massages, chiropractic session, or physical therapy. It's a lot of money and most of the time, we feel like we're fine without it. But our muscles work quite hard and over time any imbalance can snowball into really bad biomechanical behavior. So at least once (ideally twice a month) get a massage to loosen up tight muscles, and get checked up. 

IMG_0469.JPG

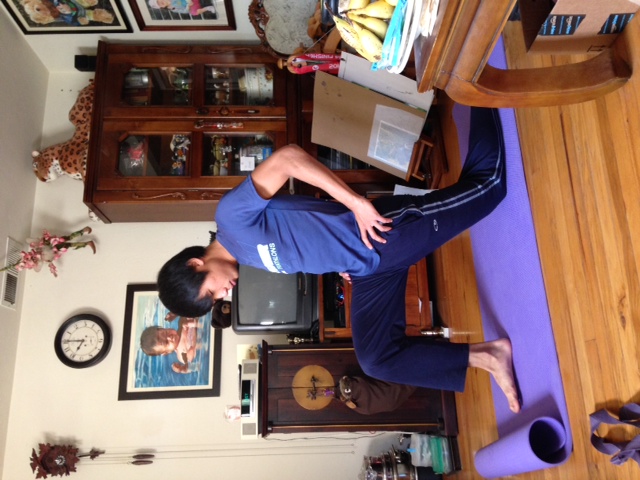
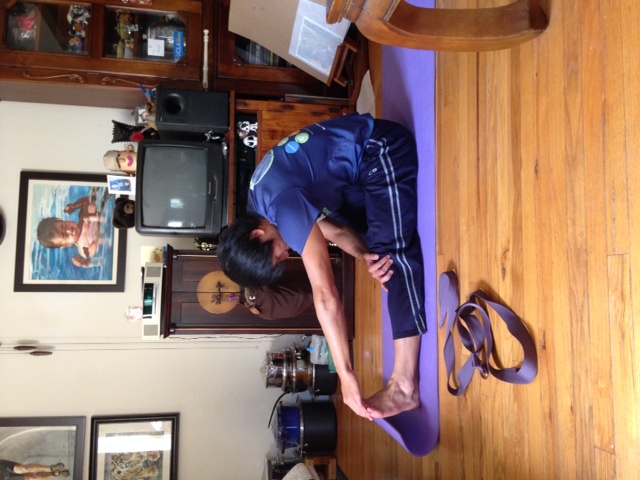
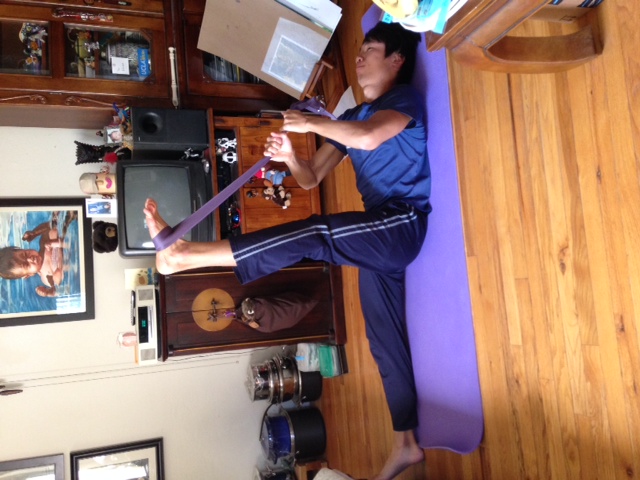
4. Dedicate 20 min of everyday to stretching, foam rolling, and bit of self massage. Over the past 5 years, I've always dedicated at least 20min a day to stretching (my hips, quads, hamstrings). Here are the 5 main stretches I do before bedtime. Why do I do these stretches? You have to remember that each movement you produce is a result of contraction of a muscle. There's always a counter movement to that motion. Therefore there's another muscle on the other side that does the contraction which undo the first movement. Essentially whenever a muscle's contracting to move a limb, it is also pulling on the resistance of the relaxed muscle on the other side. The loser that muscle is, the less energy you use. Using smallest amount of energy possible to achieve the most work is the name of the game! Efficiency!

Part II Training

5. Mileage. This is HOTLY debated but general consensus is that without decent volume, you cannot become a great runner. Unless you're Jesse Thomas or someone who has a running background, or you're just a natural gazelle. What has worked best for me has been consistent miles for 4-5 days a week. They don't have to be crazy. For me personally they're 5-10 mile runs on average with a long run thrown in there. But I've seen competitive runners run 5-7 miles 4 times a week also with great success. The key is frequency and consistency over 2-3 months period of non stop running. If that means staying conservative and running 2-3 miles some days then do it. I do it just to stay in rhythm. Rhythm with running is also very important. The body gets in a groove where it knows how to use all your muscles in harmony to run the best. Once you take 3 or 4 days off it's when things go out of whack. Find out how much mileage you can handle without injuring yourself, and be consistent with it. That number for most people in school or a job or other commitments, is 25-50 miles a week from my observation.

6. Long Run. This like the long ride in cycling CANNOT BE SKIPPED. It can be skipped during taper weeks or when you absolutely can't run it. But during a build phase, you need at least 2-3 of these in order to build a foundation for all your other work outs (track, tempo, etc). The long run teaches your body how to run when tired and also use fat as fuel. We all burn a mixture of fat and carbs during activities. The goal with the long run is to increase fat in that mixture. In other words, also raise your aerobic threshold so you can stay aerobic for higher intensities down the road.

7. Variation of Pace. I have to credit my coach Keith McDonald for introducing this into my program. We have a lot of change of pace where we do (4min steady, 6 min hard, 4min steady) to make the body uncomfortable and become powerful at controlling and maintaining pace. Before I'd train hard at one or two zones (easy and hard lol), and I only got so fast through that type of monotonous training. The body needs stimulus like how some of us (like me) prefer to watch movies than read a script of the movie. Training needs to be interested and surprising sometimes in order for the body to adapt and get better.

8. Hill Running. I grew up around hills so I'm a little bias but hills are great for building strength (resistance training) and also improving your top end fitness without the stress of a track work out. Track work outs are high intensity and high impact on joints, muscles, etc. Where as hills can give you the same cardiovascular benefit but less harsh impact on the track. Do be careful with going downhill. Take downhills slow or walk them if you have to. The heavy impact of going downhill is something that you don't want excessively in your routine. 
Some example of hill work outs I've done : 5-6x 3min hard (zone3-zone 4) up a 5% grade.
You can also find a route that has a total of 700-800 ft of climbing or less. When it gets more than 800 its when it becomes not beneficial in my opinion.

9. Biomechanics: Through trial and error I've studied, researched, experimented and learned a lot about running mechanics. I had a couple evolution of my running technique and each phase got me faster and closer and better. I've dropped times in all distances, (1 minute in 5k, 3 minutes in 10k, 9 minutes in half marathon). Here are the 4 most important things I've learned.

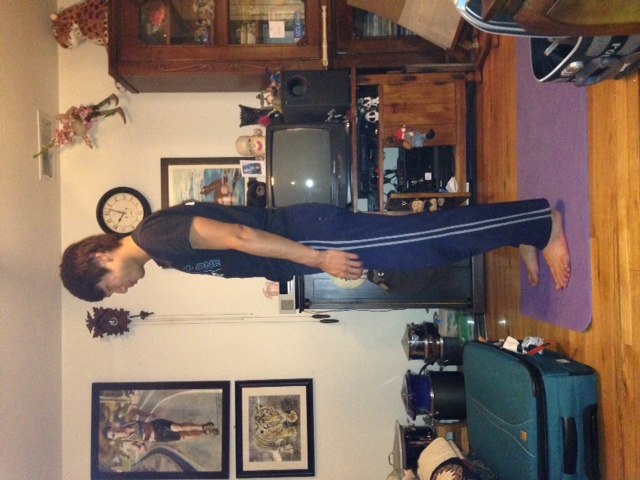
i. Good posture, forward lean. You want upper body to be tall and taut. There shouldn't much side to side movement. You want your upper body to be stiff and transfer all the energy from your push off into pushing you forward. Having a forward lean utilizes gravity to pull your forward as well and maintain your forward momentum.
ii. Arm Swing. When your legs swing back and forth to keep you moving, a lot of angular momentum is created. This means that your legs are trying to make your body rotate back and forth, side to side (with an axis that goes straight through top of your head down your spine). To counter balance this, your arm's there to create a counter angular motion that opposes your leg motion and keep your motion forward. 

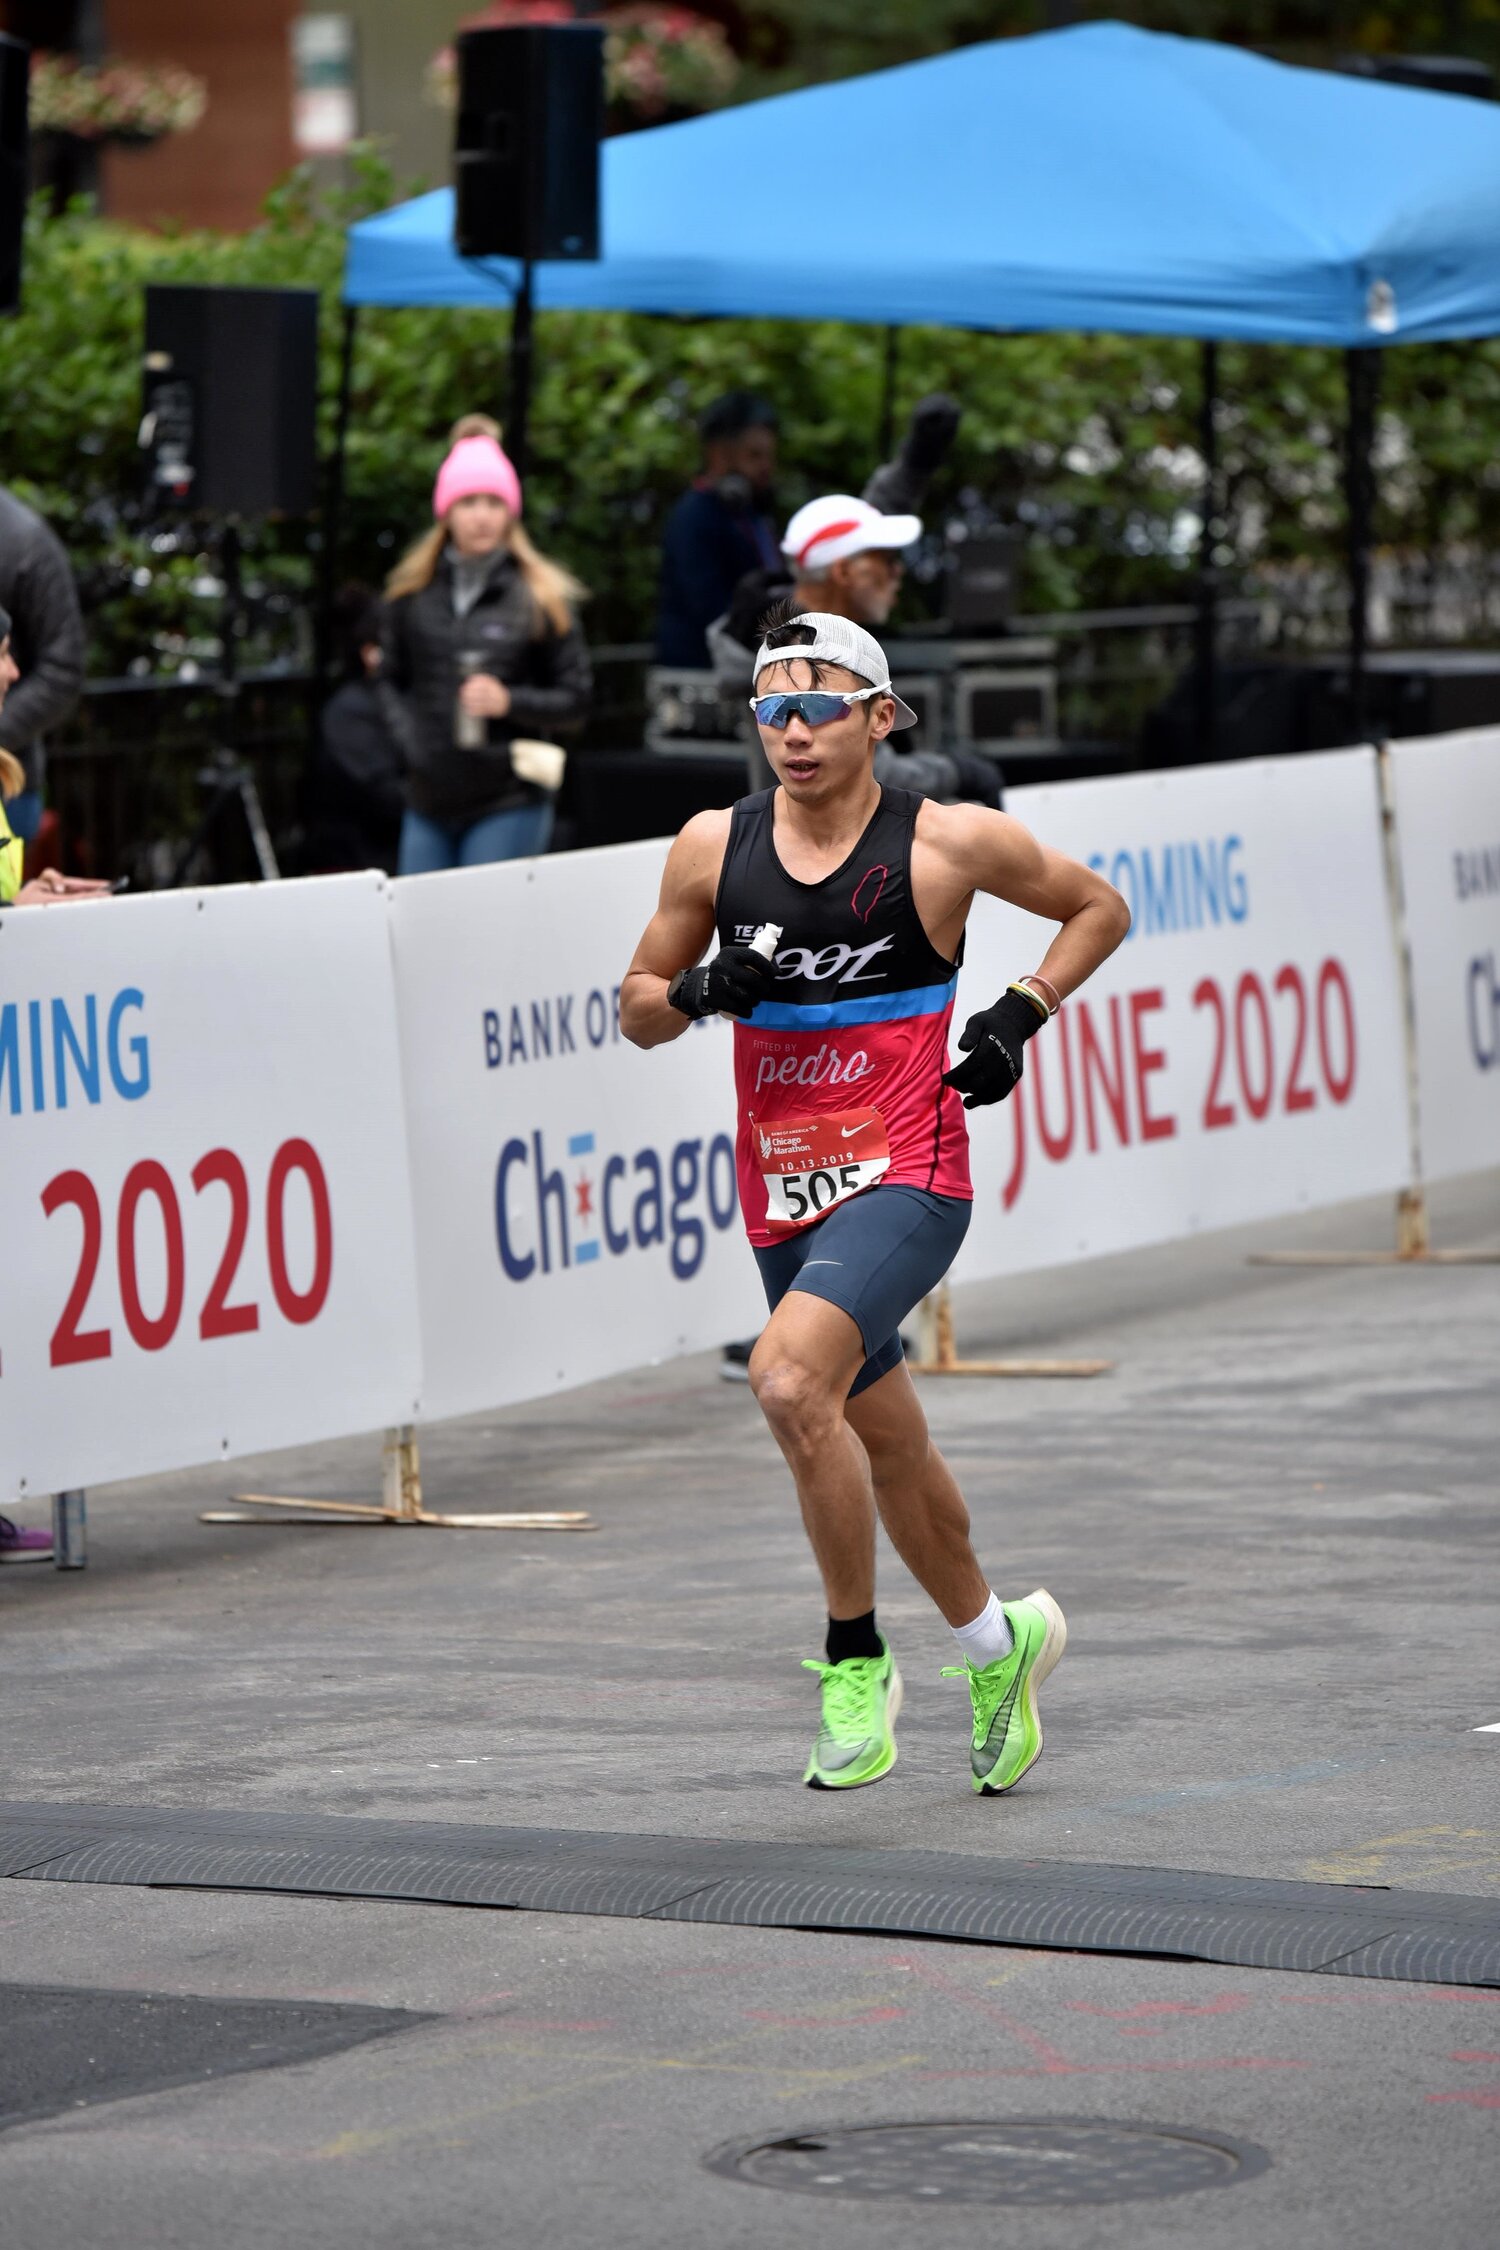
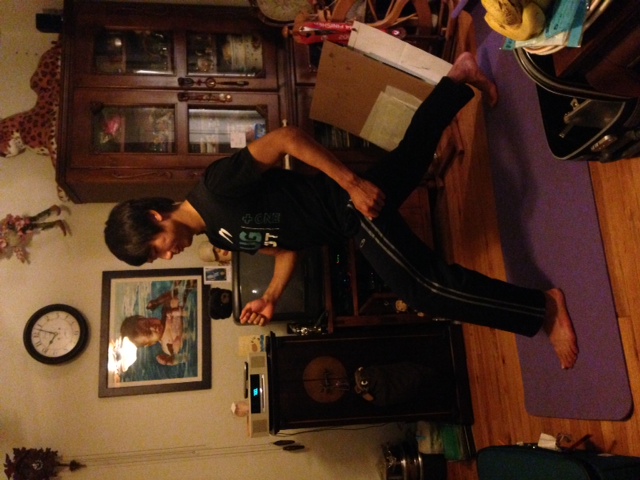
iii. Heel Lift. All elite runners have this quality. Shown below in the picture. All except your slowest pace, you should actively try to pick up your heels with your hamstring. This enables your leg swing to be more of a cycle and also prevents you from being quad dominant and encourages you to use your glutes (more on that below). The heel lift helps push your body forward and afterwards also bring your leg back so your hip flexors don't have to do any work to bring them back. More energy saved. Points. 

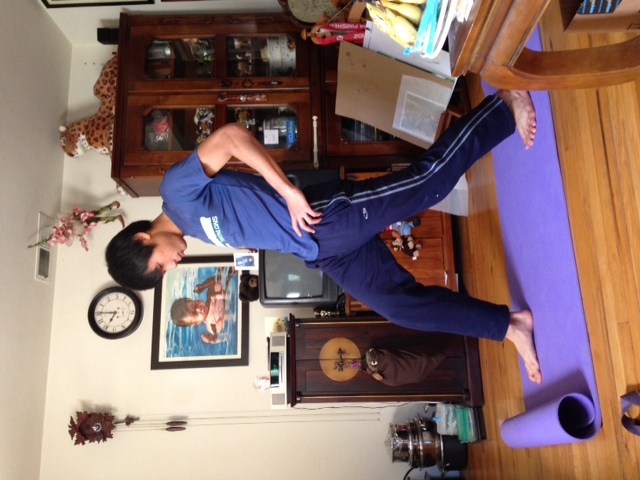
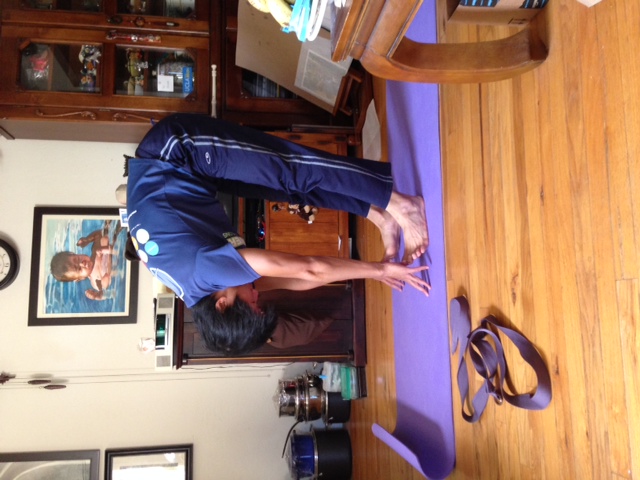
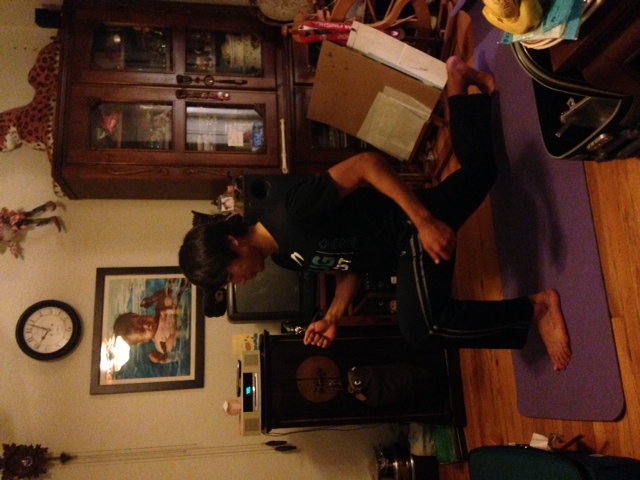
iv. The push off motion should use the same muscle as the ones used for lunges, that is GLUTE DOMINANT RUNNING. This is my biggest breakthrough over the last year. I always tweak my technique every year and this is the one that had the most bang for the buck. A lot people are quad dominant runners (here in the states anyways). They push off by doing a firing action similar to that of knee extension. They're extending their legs straight and using their knee as a stress pivot point instead of driving from their hip and core, which has all the strong muscles, your a$$. And yes, your butt is money because it is very strong and doesn't get tired or injured as easily. Quad dominant running can lead to muscle imbalances and knee problems. I was a victim of IT band from quad dominant running and cycling. How do you fire your glutes? There are various exercises you can do, this one below is how I learned it:

Try "squeezing" your butt cheeks together. It will fire your glutes.

Try "squeezing" your butt cheeks together. It will fire your glutes.

Once you learn how to control your glutes together, try to separate them with exercises like step ups and backward lunges. 


10. Nutrition! You lose the most amount of fluids during running. I typically lose 2-3 pounds during an hour run depending on how hot it is. That's as lot of fluids (1 pound is 15 fluid oz approxmiately, that's a full water bottle dude). So if you can, replace fluids on the run, or drink lots of water with electrolytes afterwards. Preferably, they should also have calories (1-2 scoops of carbo pro to replenish glycogen storage). Also before runs, figure out your stomach and your meal schedule. If your run is 6+hours from your last feeding session, then have a small snack (clif bar with banana) 1 hour before the run for example. Some people can't handle that, so they need to eat far before and eat a lot. A lot of people suffer on runs just because their blood sugar and glycogen is running low. So feed yourself and be a happy runner!

Again, that's it, long article. hope it helps. If you have any input please feel free to comment (no that anyone has done that yet lol) but I appreciate you reading this is you made it this far. If you let me know I might just buy your coffee or hot chocolate. Any shoot if you have any questions about anything. I'm here to help and happy to help. 

Spread the love for swimming, biking and running people! Until next time!


6 Comments

How I improved by 15minute+(2.4mph increase!) for 56 mile cycling leg in 4 years.

3 Comments

How I improved by 15minute+(2.4mph increase!) for 56 mile cycling leg in 4 years.

I'm known for my cycling skills on the race course as I've shown during my pro debut season, I'm able to ride as fast as the top guys (2:15 @ Vineman 70.3 with a crash, 2:21 at Lake Stevens 70.3, and 2:13 at Rancho Cordova). But it did not come easy as there's a ton of work that goes into getting cycling fitness.

To give you some background, my first 70.3 bike split was 2:29 on Vineman 70.3 which is a honest and challenging course. I did that race on a tri-bike set up but without aero frame. My bike split 4 years later was 2:15 on the same course with a bike crash. So technically it's around 2:13. so a 15 minute + improvement. That's also an increase of 2.4 mph, which is pretty huge. Granted my equipment has improved over the years, from a Cannondale aluminum frame to Cervelo p2 carbon, to an Argon 18 E 118 frame, but trust me, what matters the most is the person that's doing the pedaling. 

So here are the 10 things I learned over the past 5 years. I also studied a lot of biomechanical engineering classes at Stanford so I've provided a lot of science behind what's going on. My goal is for you to speed up your progress to success as I've made a ton of mistakes that hopefully you will not make! 

1. Make sure that your fit on your bike is proper. Approach a trusted local bike fitter. Slowtiwtch.com has a list of trusted fitters. I'm sponsored by the number 1 fitter on slowtwitch, Pedro, and he can be reached at p-fits.com. Proper fit is essential in avoiding injury and maximizing your performance. If you're worried about the price, a proper fit cost around 175 dollars or less for tri bikes and around 75 bucks for road bikes. It's a much smaller investment compared to everything else you have to buy. So do it!

 2. Long Rides cannot be skipped or substituted. There are a lot of talks about replacing long slow rides with shorter high intensity interval sessions. While I understand that many people don't have the luxury to ride long everyday (I don't personally), having one weekly long ride is a must. 

Long rides forces your body to go into energy-deprived state and forces it to adapt and use fat as fuel. 2.5 hour-3 hour is a minimum in gaining any marginal fitness. To go to the next level, try riding 3.5-4 hours for your weekly long ride during your base period. You will get stronger and build a solid base for the upcoming season.  *Try going with a friend or two. Excessive 4 hour solo rides is not recommended for mental wellness(personal experience :P)

And don't just ride long and slow for 4 hours. More and more studies have shown that slow, long, steady miles actually don't benefit as much as conventional wisdom has suggested. It is the variation of training, and stimulus that improves fitness the most. So try breaking up the 4 hour ride into:
30 minute warm up, build from easy to steady, then 10 minute steady in TT position or in the drops, 10x(30 seconds fast, 30 seconds slow), 5 minutes build from steady to tempo. 5 minutes easy.
40 minute easy-steady(90rpm), 20 minute steady-tempo (big gear, 60-75rpm)
20 minute easy-steady(90rpm), 10 minute steady-tempo (big gear, 60-75rpm)
2x(10 minute easy-steady(90rpm), 5 minute steady-tempo(big gear, 60-75 rpm))
3x(6minute sit up (70rpm)z2 2 minute stand up (60rpm)z3, 6 minute (progress from 80rpm to 90rpm) z2)
Cool Down til you hit 4 hours. 

3. Eat and Drink on all rides. It is important to practice and adapt eating and drinking during riding because that's what you'll be doing in a race. For any ride with intensity, per hour I drink 24oz of 180-200 calories(2 scoops of CarboPro) with electrolytes (nuun tablet). If the ride is longer than 1 hour, than I eat a gel per hour (100 calories) or eat part of a clifbar. Rule of thumb is 2 calories per pound of body weight per hour. 

Helps with recovery, keeps you fresh for your next session and tomorrow, and adapts your digestive system to work while exercising. Remember triathlon is all about consistency, being able to repeat the training and keep up that work load. Replacing carbohydrate/Electrolytes is extremely helpful to combat fatigue.

4. Find your natural cadence, but also ride all variety of cadences. Your natural cadence the cadence that is most efficient for your body. Everyone has a different composition of muscle types (slowtwitch type I, and fast twitch type IIA, type IIB). Type 1 or slowtwtich is more suited for high cadence, low force, less torque, high use of oxygen (higher heart rate) because your muscles are working less hard but it's working more frequently.  Type 2A is more suited for stronger cyclists that like the push the big gears (70-80rpm). In general bigger guys (160-170 pound and muscular) will want to take advantage of their strength and push a lower gear (80-85rpm) while skinnier guys (maybe myself) would like to push a higher gear so use our aerobic system more and stress our muscles less.  (*Type 2B is reserved for high power sprints that triathletes dont really do).  So everyone's own natural cadence is unique. The 90rpm rule is a good rule of thumb, but I've seen people pedal at 100rpm(Ironman World Champ Sebastian Kienle) and as low as 85 rpm(Multiple Ironman Champ, Jordan Rapp).

Efficiency comes from utilizing and maximizing the amount of the pedal stroke where you produce power. The higher the cadence, the more "empty" pedaling you're doing, which means you're spending more energy moving your legs than actually pedaling. Lowering the cadence can help find a sweet spot where you can produce torque throughout the stroke. But lowering it too much, you start pushing the boundary of your muscular efficiency. Your muscles are built to contract at certain velocities. The amount of force your muscle fibers can produce peaks at a certain velocity (hence your natural cadence) and it drops off when contraction is too fast and too slow. Pushing bigger gears also eats into your glycogen storage in your muscles which may lead you to bonk (no one wants that)

I've found that it's usually an iterative process to find that sweet spot cadence. I used to mash gears (75-80rpm) because that's what my mentor Brady rode at and some other pros were doing. I then started spinning a lot (95-100rpm) to see if that works better for me. I've found that my natural cadence is around 92-90 rpm and it slowly drops off to 87rpm as I fatigue.  So it's important for you to find out what that cadence is for you. Which cadence gives you a reasonable heart rate, reasonable perceived effort while putting out watts, and which is most comfortable? 

5. Incorporate big gear work outs. Big gear work outs (z3-z4 intensity done at 60rpm or lower) is a must to gain strength. I just read that Sebastian Kinele (2014 Ironman World Champ and a bike monster) does work outs at 40rpm (INSANE!). Some works that I do are 5x4min big gear with 3 min rest, or 3x15min at 60rpm at threshold. Also do this in your aero position. You will get really comfortable and strong. I've avoided doing these work outs because they're extremely uncomfortable but once I started doing them, I made a sudden jump to the next level.  

6. Spend time in the aero position(A LOT). I've seen triathletes (myself included) ride 3 hours and spent less than 30 minutes in the aero position. The only race that only requires you to be in the aero position for only half an hour is a sprint distance event. Olympic is at least 60 min ish, Half Ironman is 2.25 hr to 3-4 hr. It's VITAL to practice producing power and exerting big effort for extended periods of time in the aero position. After I started working with my coach Keith, we spent a ton of time in the aero position.  Some example work outs:

2-3x20min, 10 minute easy in between, at threshold.
4x15min, 5 min easy in between, intensity is moderate-hard 
5x8min, with 2min easy in between, intensity is moderate-hard

7. Race Intensity. The previous point leads me nicely to my next point. Race intensity at race position. Again, when I first started I rode a lot. I did not realize that there were a lot of stoplights, and downhills where I don't pedal. The fluctuation in heart rate is crazy and nothing like race conditions. Not to say that you should train AT race pace all the time, but it's important to have structured intervals of close to race intensity in order for your body to adapt. So when I went to races, I just got destroyed, because my body's never really done intervals longer than 15 minutes before.

If you have a heart rate monitor, or power meter, use them! Try doing one of the work outs shown above (4x15min, etc) and hold your heart rate at race intensity (generally zone 3 to zone 4). If you don't have a HRM, or power meter, then find a nice long hill, and try to keep your perceived effort constant and steady. 

8. Equipment Choices. Smart decisions can save you a couple seconds here and there and all together, they can add up to minutes.

a. Between the arm water bottle mount is a popular one that's very easy to accomplish with zip ties.
b. Behind the seat water bottle is also doable with zip ties. But Practice putting water bottle back in, it's hard!
c. Make sure you tri-kit is tight, and nothing lose is flapping around. It slows you down more than you think.
d. GET A DISC WHEEL. i can't afford one so i got the next best thing, a disc cover . If you happen to have an zipp 808 rear, it's actually faster than zipp's own disc. Having a covered back wheel is dramatically faster. High recommend it./
e. Tire Choice. Clinchers have been shown to be faster than tubulars which is great b/c tubulars are a bit of a pain to deal with. The fastest tire in the industry is Continental Grand Prix 4000s II. (most pros ride 700x23c, some ride 24s, and very few ride 25s. If you're a heavy rider, 25c would be great, otherwise, as of now, 23c is the best option for general public) Puncture resistant and low rolling resistance. And most aero. Best of all worlds. 

If you're not a fan of continentals or high quality German craftsmanship, then visit http://www.slowtwitch.com/Products/Things_that_Roll/Tires/Fast_Tires_2013_3787.html
for more tire choices.
f. Gearing choice. This is from my personal experience, but most bikes sold have compact nowadays (50 teeth big ring, and 34 small bring in the front). This is definitely not enough when downhills come around. The minimum you should have is 52 teeth.

if you only had to buy one cassette, I recommend 11-28 combination. It gives you best of both worlds with good climbing ratio and a fast small cog. It does suffer a bit on gear difference between gears. 11-25 is also popular. But 11-28 will cover all tough courses including Wildflower. 
g. Aero helmet has been shown to save a ton of time. There are also hybrid road-aero helmet now so you only have to buy one!

9. Ride hard up hill, ride easy downhill. From physics, drag is increased by factor of (speed) squared. Drag is directly correlated with amount of energy you need to spend. This means as speed get higher and higher on a downhill, power output has diminished returns, meaning if you push 20-30 more watts you're only going slightly faster (0.5 mph). So pedal easier downhills.

On the other hand, riding uphill, there is less drag, and most of your power goes into overcoming your weight, which is correlated with force of gravity. Gravity does not increase or decrease with your speed. It is constant. Therefore, you get more bang for your buck if you push more power. Your speed will increase much more. 

So ride slightly harder on the uphills (10-15 watts above your target power, or 2-4bpm higher for heart rate). Keep in mind that you can only increase your power for so often. From Powermeter handbook , if your target zone is zone3, and you're going into zone4, you're burning "matches". For a 70.3, you have around 10 minutes or less worth of total duration where you can increase you power on uphills in such a fashion. I overdid it recently at Wildflwoer and paid for it on the run. So ration your efforts and go fast!

10. Nailing your taper. I've taken tapers too easy in the past and ended up having a terrible bike on race day. I've read similar stories with Pete Jacobs (2012 Ironman World champ). The key is maintaining strength. Do one or two work out race week where you remind your body the race intensity (3-4x6min at race pace, regular cadence), and another shorter work out (4x90 seconds at or above race pace, big gear) to maintain your strength muscles. 

That was longer than I expected, but I think that is all for now. I have much more to share so stay tuned! Please email me or contact me if you find anything confusing or would like to discuss about anything. Also I don't have answers to everything. This is what I think has worked best for me personally. I'm constantly learning and improving my own training methods so if you have any inputs please let me know!

Thanks for reading if you made it this far! 


Yu


3 Comments

Part I. How I shaved 5+ minutes off my 1.2 mile swim(15+ seconds per 100m) since 2010

2 Comments

Part I. How I shaved 5+ minutes off my 1.2 mile swim(15+ seconds per 100m) since 2010

It's no secret that swimming is my slowest leg and it's something that I try to improve each and everyday. For someone with my original ability and swimming background(virtually none), it's modestly impressive I'd say, that I managed to improve my swim pace by 15 seconds per 100m, that's 5 minutes over 1.2 miles in 4 years.  

I always want to share what I learned with the world so I have organized tips in order of difficulty. So as things go down, it becomes exponentially harder to grasp and understand. And you should also be getting faster and faster as you go down the list. Take it one step at a time! 

1. Don't spend too much time trying to swim with perfect technique. I spent about 1 year swimming alone because I thought technique trumps everything else. In swimming that's not the case. Technique is important but you can only have good technique if you have the strength and fitness to hold it. Gaining fitness through bad technique is not breaking the law. So it's okay. All of us swim badly at least 30%+ of the time when we get tired anyways. Our technique holds together for maybe 25yards, then maybe 50yards, then eventually 400 yards. With some rest, you can do 400 yards great again. And the continuous improvement will get you to where you want. 

2. Swim with other swimmers (slightly faster than you)  at least 75% of the time. Swimming by yourself is hard even for fishes. That's why they swim in schools. (HA!) Seriously, swimming can be very lonely and a bit daunting at times (10x400s anybody?) So share your pain with others and pain will become joy.

A.  I've come to the conclusion that swimming with people lowers the perceived level of exertion and also peer pressure keeps you honest and working hard. Whenever I swim with a group, leading a lane, or following a lead swimmer (even swimming 5 seconds behind someone will give you drafting effects), I always swim 2-3 seconds per 100yard faster than alone.

B. It's also helpful to watch other people swim and learn their technique. Visualization is key for athletic movements.

C. Good options are local master swim groups with swimmers of all speeds.

3. Kicking should be the least of your worries. Not to say that you don't need to kick. But I've been to programs that make me kick a quarter of a 60 minute session. That's way too much. Majority of your propulsion comes from your pull. You only have so much time to swim, make most of it by actually swimming. 

4. Head position: stare straight down with your neck straight. There's many theories, but through my observation with top swimmers in Olympics as well as triathlon, they all stare straight down with their neck straight and taut. Keeping your head down enables you to have a good body position where your hip is allowed to rise a bit  as opposed to sink a bit. 

5. Consistency is KeySwim at least 3 times a week, every week, all year. Athletes that didn't grow up swimming lose the feel of the water or their swimming shape really fast. it's important that you keep a consistent amount of swimming going every week, all year long if you're committed to becoming a better swimmer. I swam 4-5 times a week for 2 years.

6. Try using a tempo trainer, to control cadence of your stroke. The best open water swimming technique is a constant pulling motion with no dead spots, no gliding. As your right hand is finished with its pull, you should begin your catch for your left hand. Start with 60 strokes per minute. Then increase it incrementally. Really great swimmers swim at 80-100 strokes per minute. So aim for 60+. 

7. Trying swimming with a band around your ankle, No BuoysAnkle band ties your ankles together so you can't kick. Therefore you have to swim really fast in order to stay afloat. It is analogous to swimming uphill, where any little deficiency in your stroke is amplified. When I first started I couldn't swim past 5 yards. Now I can swim 50 yards-100 yards with it. The really good swimmers can do 3000 yards. @_@. 

Start with 4x25 yards with 45 seconds rest. Keep your head down, press on your chest, and taut body. And pull with high cadence and hope you make it to the other side. Overtime you will get stronger. 

8. Pull your body forward, not pull water back. Mentally, you shouldn't think of your hands and arms as propellers of boat that's forcing water back. Your forearm is an anchor that holds the water, and once you engage the water, you want to pull your body forward instead of push water back.

What's the difference? For me, this thought process enabled me to keep my body stiff and strong which helps move my body forward. They always talk about how bike frames should be stiff because bending of the frame while pedaling results in loss of power. Similar theme here where your body is the frame while swimming, and you want to keep that as stiff as possible so all the power is used to move you forward instead of deforming your body. 

9. Tubing, using Resistance Bands. Halo makes great rubber resistance bands for swim training. There are no exercise machine or free body weight exercise that emulates the motion and muscle movement of the swim pull. The only thing that comes close is pulling with resistant bands.  Here's a video of how to properly use bands, https://www.youtube.com/watch?v=Sr570KZvyBQ

1. Straight Wrist.
2. Point forearm down toward floor
3. Keeping that high elbow high.

If your deltoids are burning then you're doing it right!
Start with 7x1min on, 1 min rest. or 5x90 seconds on, 90 seconds rest. 
Halo Bands purchase link

10. Having the correct pulling mechanics. This one is the hardest one to nail. There are two main components, which is the high elbow that's covered in previous (9th) point. This one is tough to achieve but with practice and persistence you will be able to keep your elbow high and engage your lats, muscles on your back, and your chest, instead of your shoulder muscle which is much weaker compared to the three mentioned. Having a knowledgeable swim coach to watch you and give you advice is the best way to go.

The second component is often hotly debated but this is what has worked best for me in the last couple of years of trying many different things. The pulling motion is not the classic s motion that people talk about. It's also not a straight pull back. It's somewhere in between. In general the path of your hand should lie within a space 3-4 inches inline with your shoulder.  There is only slight inward motion as you begin you pull. Your hand pitches slightly inward. As your pull progresses past your upper abdomen and chest, the hand pitch changes and point slightly outward. Somehow this enabled me to grab the most amount of water and my stroke rate is dropped by 2 strokes per length. 

That's it for now. Again to reiterate, this has been the 10 most helpful things to me in the past couple of years and it may be helpful to some of you and it may not. I'm always open to new ideas and discussion so if you have any input or feedback please comment and we can have an open conversation! 

Likewise, if you have questions, please contact me through the contact page, or email me directly at yuxsjao@gmail.com

Hope you found this article helpful

P.S. There will be a more detailed, and illustrated (video perhaps) in the future. So stay tuned!


Yu


2 Comments